
How to complete setup install of Windows 10
Windows 10 setup


Sumon Ahmed
Once you performed the recommended preparation steps and created the USB bootable media, then you can proceed with the steps to complete a clean installation of Windows 10.
Warning: This is a friendly reminder that this process will erase everything on your computer. It's always recommended to make a temporary full backup of your PC before proceeding.
To do a clean installation of Windows 10, use these steps:
- Start the computer with the Windows 10 USB media.
- On prompt, press any key to boot from the device.
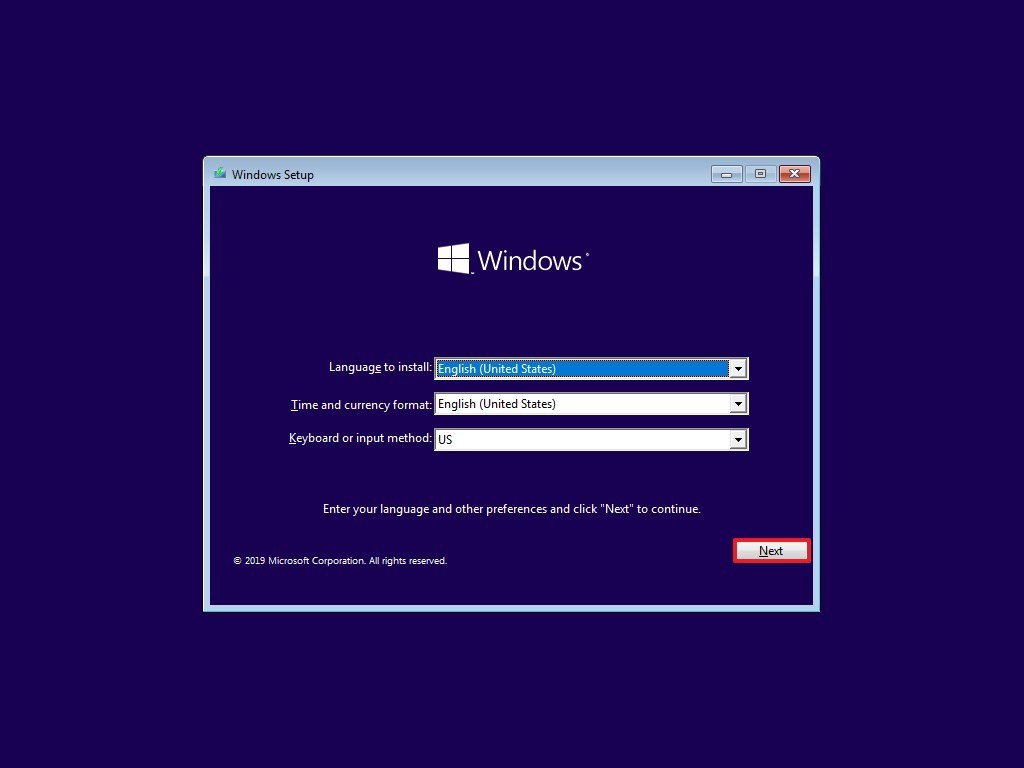
- On the "Windows Setup," click the Next button.
 Source: Windows Central
 - Click the Install now button.
 Source: Windows Central
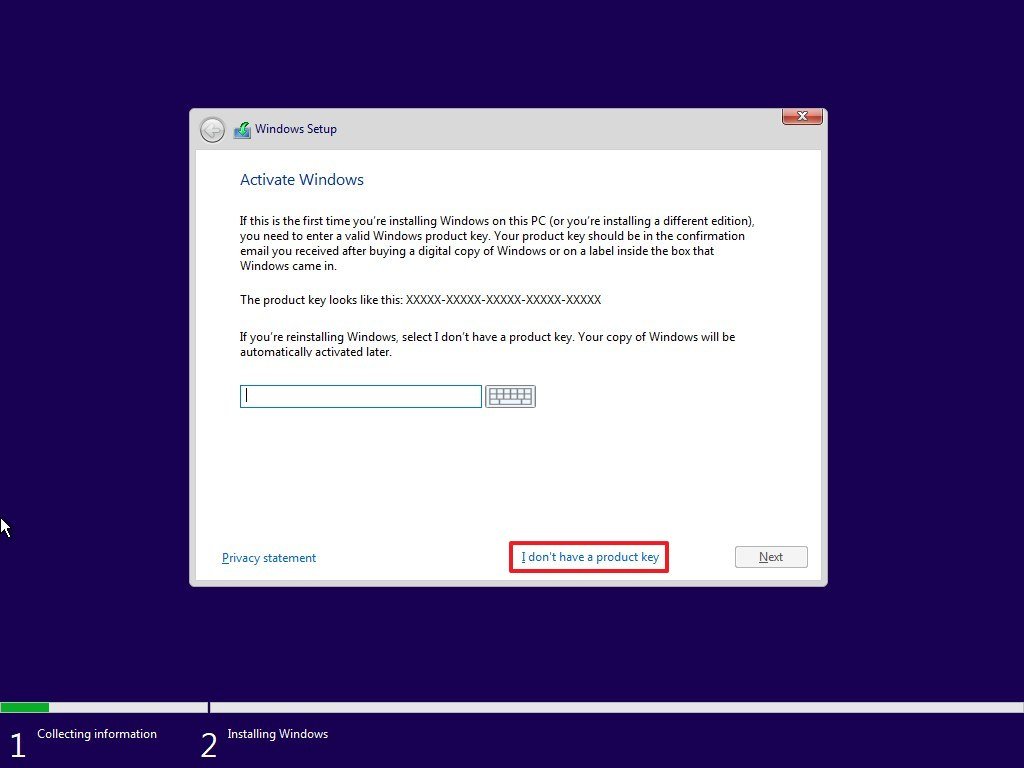
 - Type the product key if this is your first time installing Windows 10. If you're reinstalling the OS, you can click the I don't have a product key option to continue (assuming that your device was already activated).
 Source: Windows Central
 - Click the Next button.
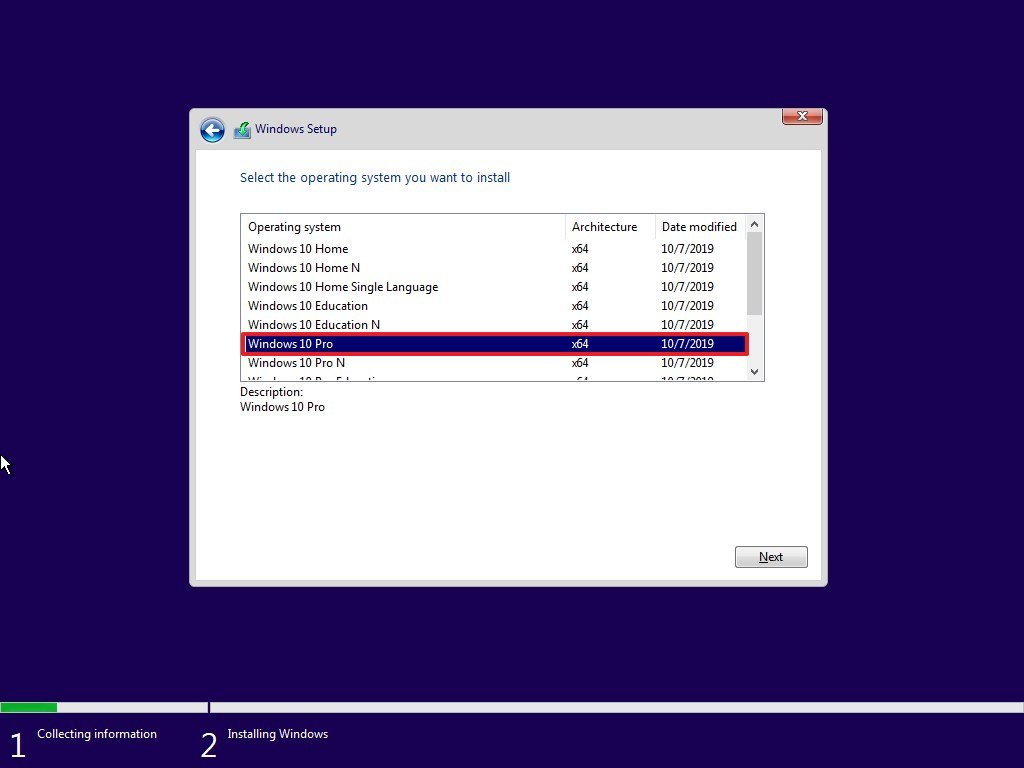
- Select the edition of Windows 10 (If applicable). This selection must match the edition your product key activates.
 Source: Windows Central
 - Click the Next button.
- Select the I accept the license terms option to continue.
 Source: Windows Central
 - Click the Next button.
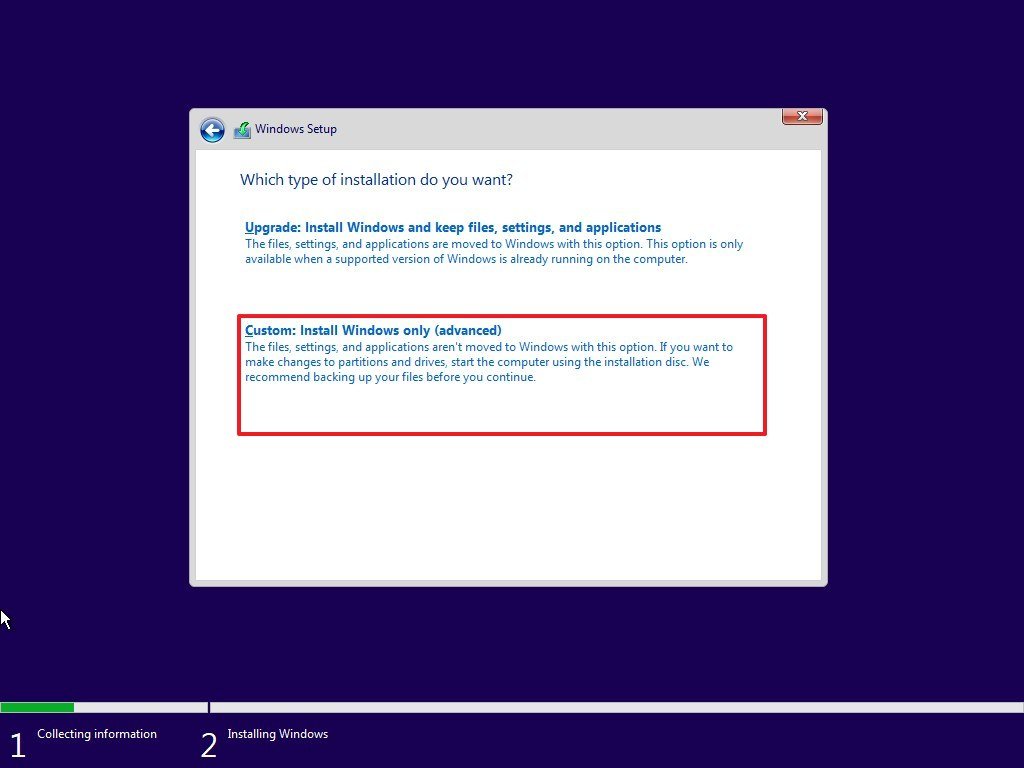
- Click on the Custom: Install Windows only (Advanced) option.
 Source: Windows Central
 - Select the partition with the current installation (usually "Drive 0"), and click the Delete button.Quick tip: If "Drive 0" has multiple partitions, you have to select and delete each of the partitions to allow the setup to use the entire drive for the new clean installation. Windows 10 will create the required partitions automatically during the process. It's not necessary to delete the partitions on secondary drives.
- Click the Yes button.
 Source: Windows Central
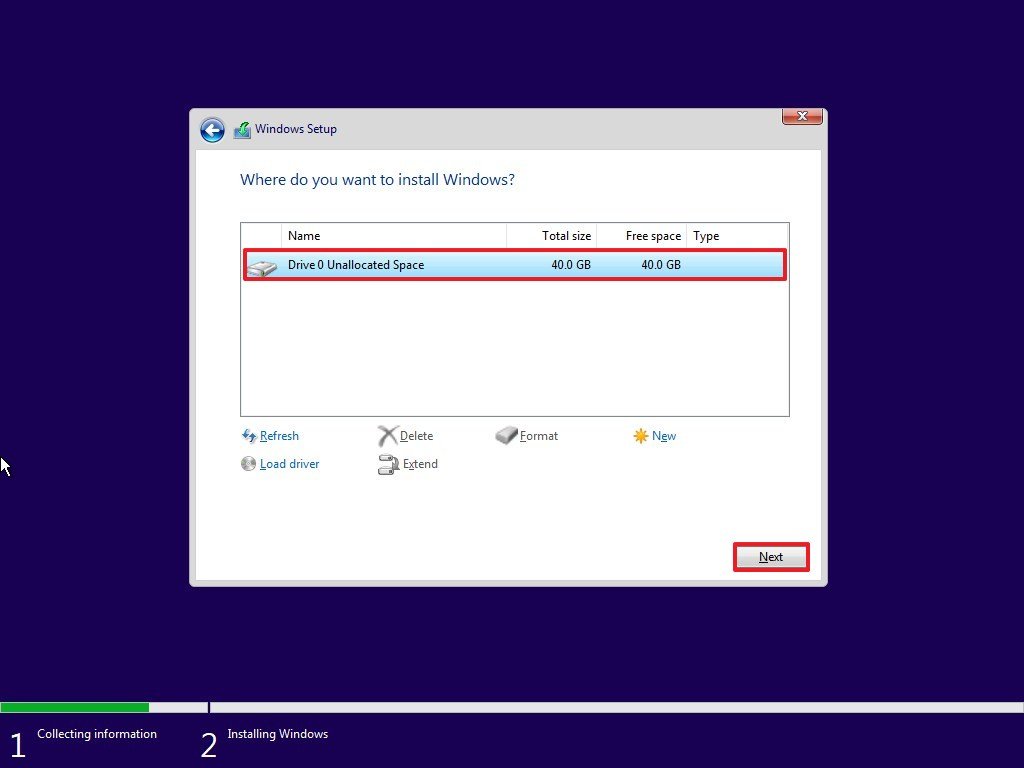
 - Select the empty drive (Drive 0 Unallocated Space).
 Source: Windows Central
 - Click the Next button.


Once you complete the steps, the setup will proceed with the fresh installation of Windows 10 on the device.
If you're planning to get rid of the device, you can stop now and let the new owner complete the setup. If you're upgrading a system that you're planning to use, then you need to continue with out-of-box experience.
Windows 10 out-of-box experience
After the installation is complete, continue with the out-of-box experience to create a new account and configure your preferences.
In this guide, we're following the out-of-box experience available with version 1909 (November 2019 Update), but depending on the release that you're installing, the steps may be slightly different.
To complete the OOBE on Windows 10, use these steps:
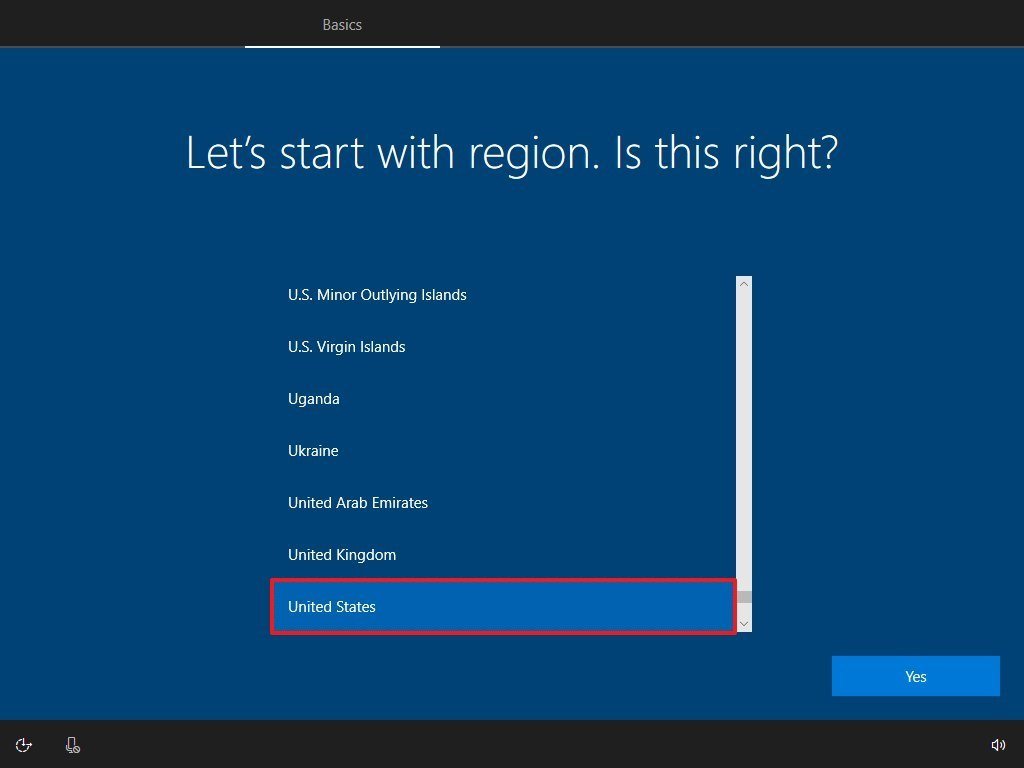
- Select your Region.
 Source: Windows Central
 - Click the Yes button.
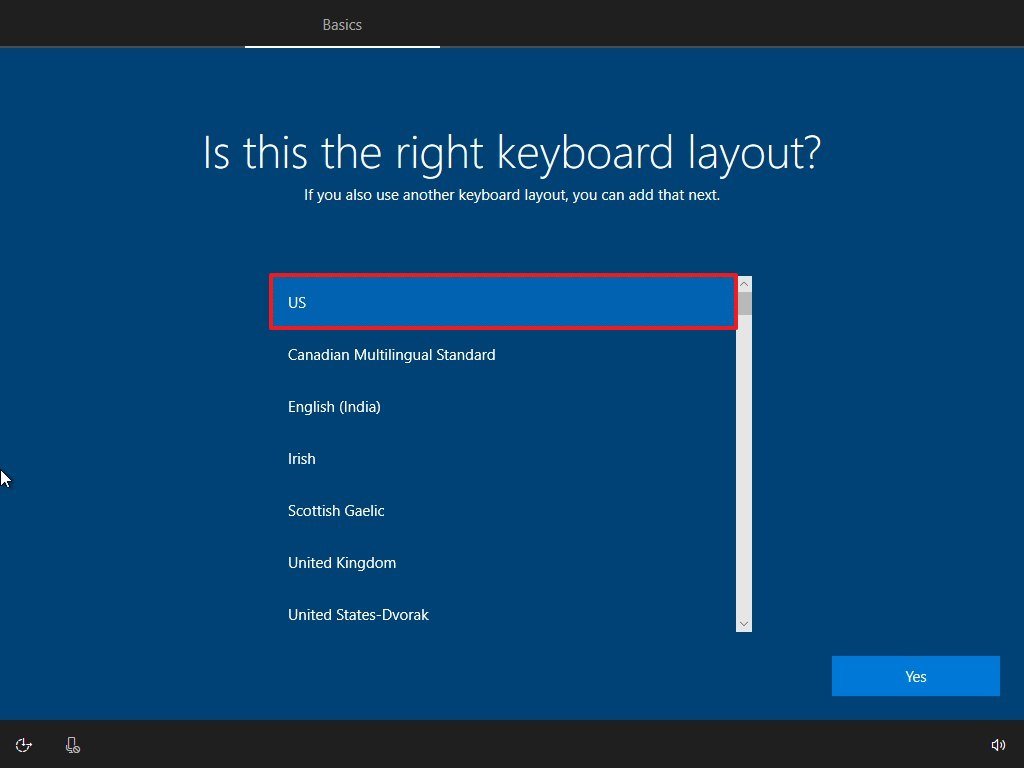
- Select your keyboard layout.
 Source: Windows Central
 - Click the Yes button.
- Click the Skip button (unless you need to add a second keyboard layout).
 Source: Windows Central
 - Click the Set up for personal use option.
 Source: Windows Central
 - Click the Next button.
- Type your Microsoft account information to create an account.
 Source: Windows Central
 - Click the Next button.
- Type your Microsoft account password. Or if you use your phone to sign in to Microsoft services, you can click the Use the Microsoft Authenticator app instead option.
 Source: Windows Central
 - Click the Next button.
- Click the Create PIN button.
 Source: Windows Central
 - Create your new four-digit Windows Hello PIN.
 Source: Windows CentralQuick tip: If you want to continue using a traditional password, click the Cancel button to skip the process.
 - (Optional) If you wish to enable Timeline to access your activity history across devices, click the Yes button. Otherwise, click the No button.
 Source: Windows Central
 - (Optional) You can supply your phone number and then click the Send button to link your phone with your computer. If you want to skip this option, click the Do it later button in the bottom-left corner of the screen.
 Source: Windows Central
 - (Optional) Click the Next button to allow OneDrive to backup the Desktop, Documents, and Pictures folders to the cloud. If you use another cloud service, or you're not interested in uploading your files to the cloud, click the Only save files to this PC option in the bottom-left corner of the screen.
 Source: Windows Central
 - Click the No button to skip the Office setup (if applicable).Quick tip: If you have an Office product key, you can click the I have a product key option, and then the apps will install automatically on your device.
- (Optional) Check the Let Cortana respond to "Hey Cortana" option to use the assistance hands-free.
- Click the Accept button to allow Microsoft to collect personal information to make Cortana more personal. If you're not interested in this feature, click the Decline button to continue.
 Source: Windows Central
 - Select your privacy settings (and don't forget to scroll down the page to review all the available settings).
- Click the Accept button.
 Source: Windows Central


After you complete the steps, the settings you selected will apply to the installation, and the desktop should now appear.


Windows 10 Setup Super post. Thanks
ReplyDelete